
Symmetry - Getting Started
Symmetry is a powerful application for visualising, processing, organising and interacting with scientific/medical datasets. Symmetry is built on Simulacrum and plugins are available to support a variety of datasets, but there is good built-in support for DICOM (including JPEG2000 and network connectivity), XML and raw NetPBM.
Since Symmetry is available for a variety of platforms, this quickstart guide aims to cover the basics of them all, with a brief summary of the differences in the mobile edition.
Do you want to download the Symmetry application? Visit Symmetry.
Desktop Edition
This guide assumes that you have downloaded, installed and started the Symmetry application. The following information explains your first steps in using Symmetry to index, interact and visualise with an medical data set.
The Basics
Overview
Upon starting Symmetry, you will be greeted by the main window. This is the hub of all of the activities that can be performed in Symmetry, most notably by using the toolbar and menu system.
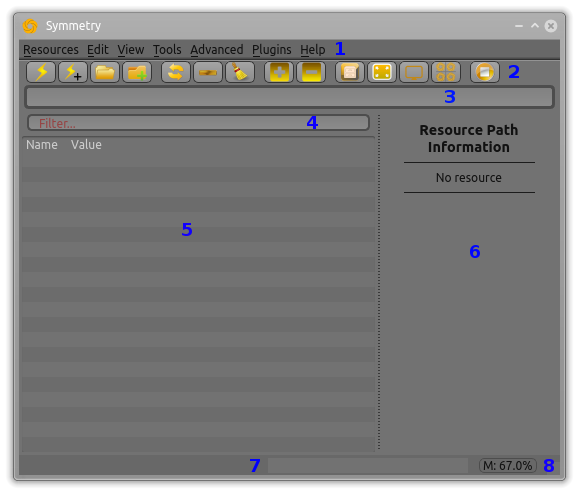
The blue-numbered elements in the main window are:
- 1
Menu system – access all of the features of Symmetry
- 2
Toolbar – quick access to key menu features (hover cursor for explanation)
- 3
Address box – enter a URI for a resource path directly (can be remote)
- 4
Filter box – filter the main data area based on a piece of text
- 5
Main data area – the main data display area for data trees (for DICOM archives/indexes, a special view is also available, which can be toggle from the menu or toolbar)
- 6
Information area – meta-information about the type and contents of the main data area
- 7
Progess bar – the progress of the current action
- 8
System memory monitor – indication of current physical memory use
The best way to explore the features of Symmetry is to browse the contents of the menu system. The menu system can also be accessed using keyboard shortcuts; each underlined character will respond to the alt-key combination (e.g. alt+r for the resources menu and so on).
General Mouse Actions
- Single Click
selects an item/resource, but does not activate it
- Double Click
selects and activates an item/resource (e.g. loads any associated image data)
- Right Click
opens a context sensitive menu for the item/resource
Example: Opening a Single Resource
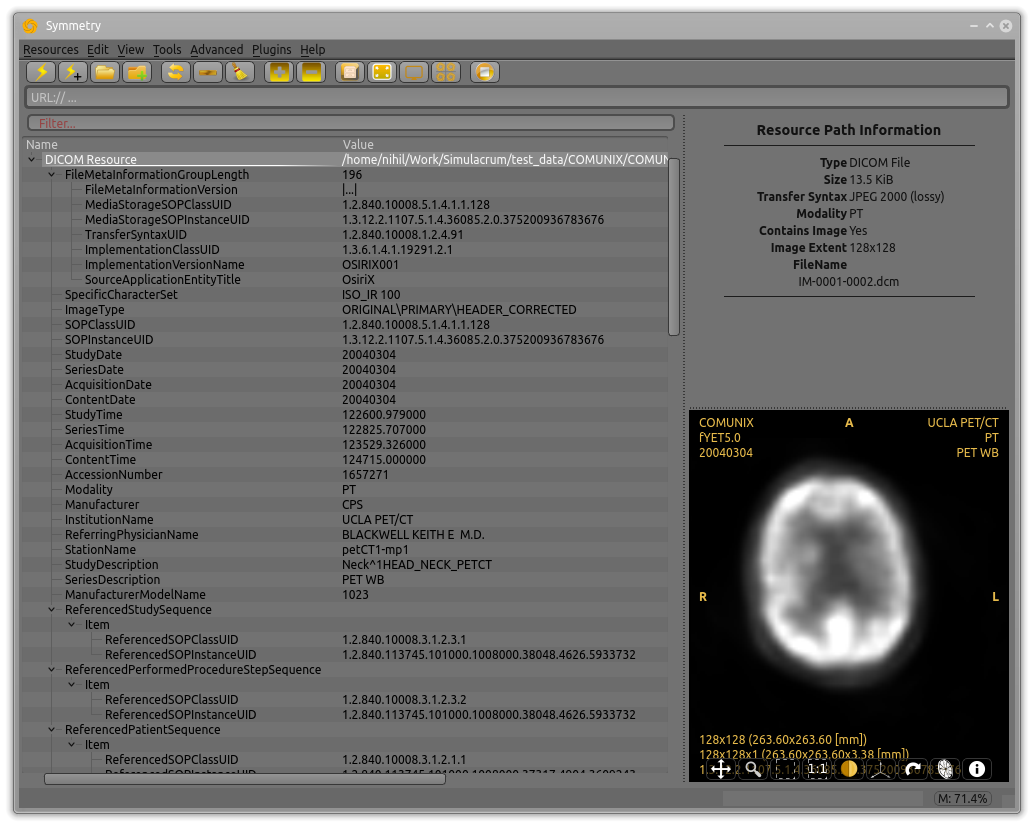
Symmetry can be used to open a single resource for viewing and editing, e.g. a DICOM file.
Steps
- 1
Using the menu, click on Resources->Open File Resource, OR press the folder icon on the toolbar
- 2
Select the file resource to open in the dialog that appears
Assuming it is of a compatible type, the resource will be displayed in the Main data area and any image data will appear in the viewport as shown.
Pro-Tips
Multiple resources (files) can be opened in a single view by selecting Resources->Multiple Resource Interface from the menu. Subsequent resource opening actions will add to, not replace, the currently active resource
A directory of files can be open recursively by selecting Resources->Open Directory Resource from the menu or by pressing the folder-with-plus icon from the toolbar (this automatically sets a multiple resource interface)
Editing can be enabled by selecting Resources->Editable Resources from the menu
Example: Indexing DICOM Data
DICOM data are typically distributed as a large set of (associated) resource objects, often as hundreds on separate files which should be combined into a single data structure. Symmetry makes this process straight forward and convenient.
Steps
- 1
Using the menu, select Resources->New Resource->Create SDICOM Archive (Quick), OR press the lightning-bolt icon on the toolbar
- 2
Select the file path to index in the dialog that appears
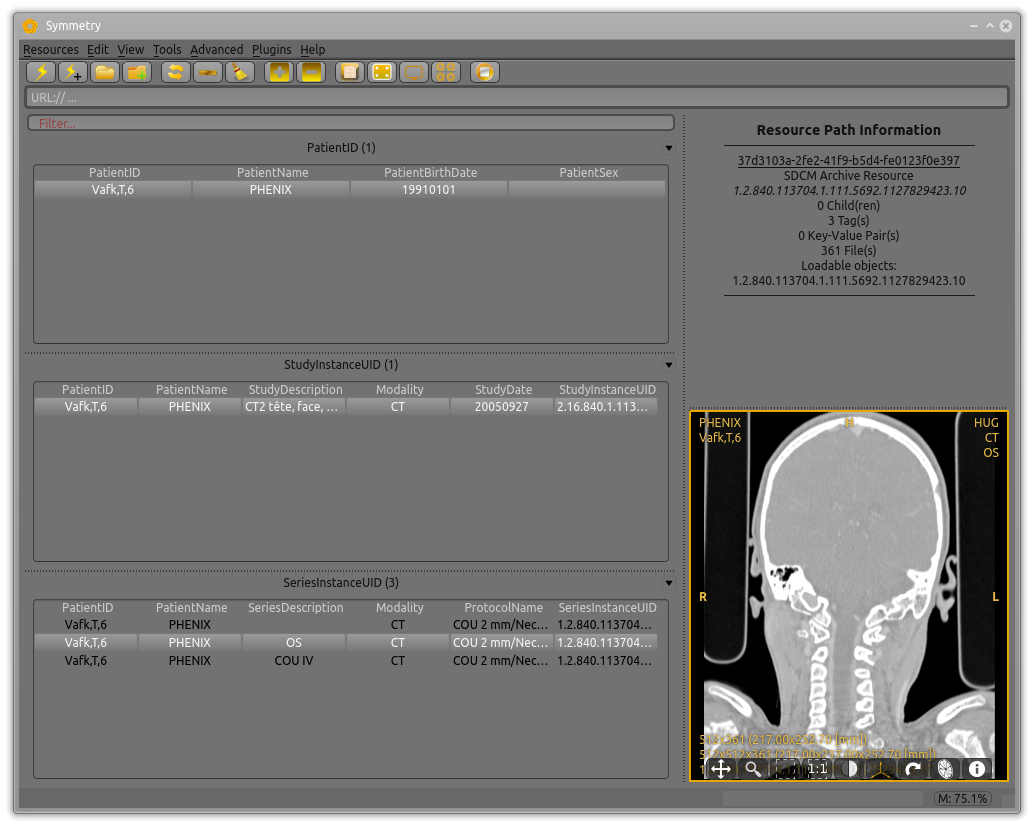
Symmetry will now scan for all DICOM files in the selected path and index them according to the default structure. This may take quite some time, depending on the quantity of data to be organised; progress can be viewed in the progress bar. The user interface is free to perform other actions during this process.
When the action is complete, the structured data will be opened, and the Main data area view will switch to the specialised structured DICOM browser. This can be toggled from the menu or the toolbar, if you prefer the tree-based view (or for editing).
Pro-Tips
In the structured index viewer, right click in a data area to add DICOM attributes to the view (all tags are available)
Generated archive indexes can be saved and opened again later (without having to re-index)
An existing archive index can be expanded with new data using “Add [directory/resource] to archive” from the new resources menu
If you want to organise the data according to a different structure, Resources->New Resource->Create SDICOM Archive (Custom)
The Light Table
Note
Coming soon!
Mobile Edition
Note
Coming soon!